Wistia Webinars 101: Your Top Questions Answered
July 10, 2024
Topic tags
Wistia’s all-in-one webinar software will help you host polished live events from registration to distribution.
This feature has been out for a while now, and we’ve gotten some recurring questions about it. So our product experts Colby and Felix recently hosted a live Q&A to answer them. They covered everything from setting up registration pages to simulcasting on social media.
If you missed the webinar, don’t worry! We rounded up the FAQs (plus Colby’s and Felix’s answers) for you.
Wistia's Webinar Feature FAQs
- Can I schedule a pre-recorded webinar to autoplay at a specific time?
- Can I show a countdown before my webinar begins?
- Can I integrate with my marketing automation platform?
- Can I simulcast my live stream to social media?
- How do I access the Live Events page?
- How do I set up registration for my event?
- How do I track who has registered for my event?
- How long can my events be?
- Does Wistia automatically record my events?
- How do I join as a host or panelist and go live?
- How many panelists can I have and do they need a Wistia account?
- How do I set up an engaging viewer experience?
- Is there a way for me to see the number of people attending my webinar live?
- Do you have webinar analytics?
Can I schedule a pre-recorded webinar to autoplay at a specific time?
As of right now, you can’t schedule a pre-recorded webinar to start automatically.
But if you’ve got a pre-recorded webinar ready to go, you can upload it to your account before the scheduled time and play it during the event without having to share your screen. You just need to go in and start the event manually.
We highly recommend being present during your pre-recorded webinar because it’s the perfect opportunity to stay active in the chat and focus on connecting with your audience.
Can I show a countdown before my webinar begins?
Absolutely — and it’s easy! Here’s how:
- Upload a countdown video to your Wistia account anytime before the event.
- When you’re ready, open the Media tab in the lower right corner of your screen.
- Find the countdown video and play it!
Can I integrate with my marketing automation platform?
You sure can! We have HubSpot, Adobe Marketo Engage, and Pardot integrations available on the Advanced Plan. If you’re not on the Advanced Plan, you can try ’em out with a free 14-day trial.
How do I access the Live Events page?
You have two ways to open the Live Events page from your content library:
- Select Live Events from the left-hand menu
- Press the + icon at the top right of your page
With the Live Events page open, you can:
- Give your event a title
- Choose a date, time, and time zone for your live event
- Choose the approximate duration of your event
Then hit the Create button, and you’ll be off to the races!
How do I set up registration for my event?
You don’t have to set anything up! Just make sure the registration option is turned on when you’re creating your event, and Wistia will generate a registration page for you.
Once you’ve got your registration page, you can:
Customize your registration page
On the left, you’ll see the option to customize your event. From there, select the registration page option. You can:
- Choose the radius of different boxes on the page
- Upload a logo and choose its size
- Add a link to your logo
- Add an event description (if you haven’t already)
- Upload an event graphic
- Add speakers (this option is only available on our Advanced or higher plans)
Set up email notifications
From the Customization screen, you can also set up confirmation, reminder, and follow-up emails for people who registered for your event.
Just choose your email settings, customize your emails, toggle the switch on, and kick back and relax as Wistia sends these emails for you!
Embed and share your registration page
Once that work is done, you can go to the Registration Form tab to see what it looks like.
If the form looks good, grab the page URL and share it far and wide! You can share it:
- On social media
- Via email
- In a blog post
- Anywhere else you can think of
And you can even embed the registration page on your site!
How do I track who has registered for my event?
On the Live Event page, select Registrants on the left. As folks register, their information will appear here. You can view and export the registrant list anytime before your event.
How long can my events be?
As long as you want! Let’s cover the event duration that’s included in your plan:
- Pro Plan: Up to an hour long
- Advanced Plan: Up to two hours long
- Premium Plan: Up to four hours long
No need to stress if your event runs over — it won’t end abruptly! We’ll just charge an overage fee of one dollar per minute.
Does Wistia automatically record my events?
Yes, and we’ll save the recording in your account as soon as it’s over. From there, you can use our built-in editor to polish it up and/or pull clips for social media.

All-in-one Video Platform
Streamline Your Webinar Process
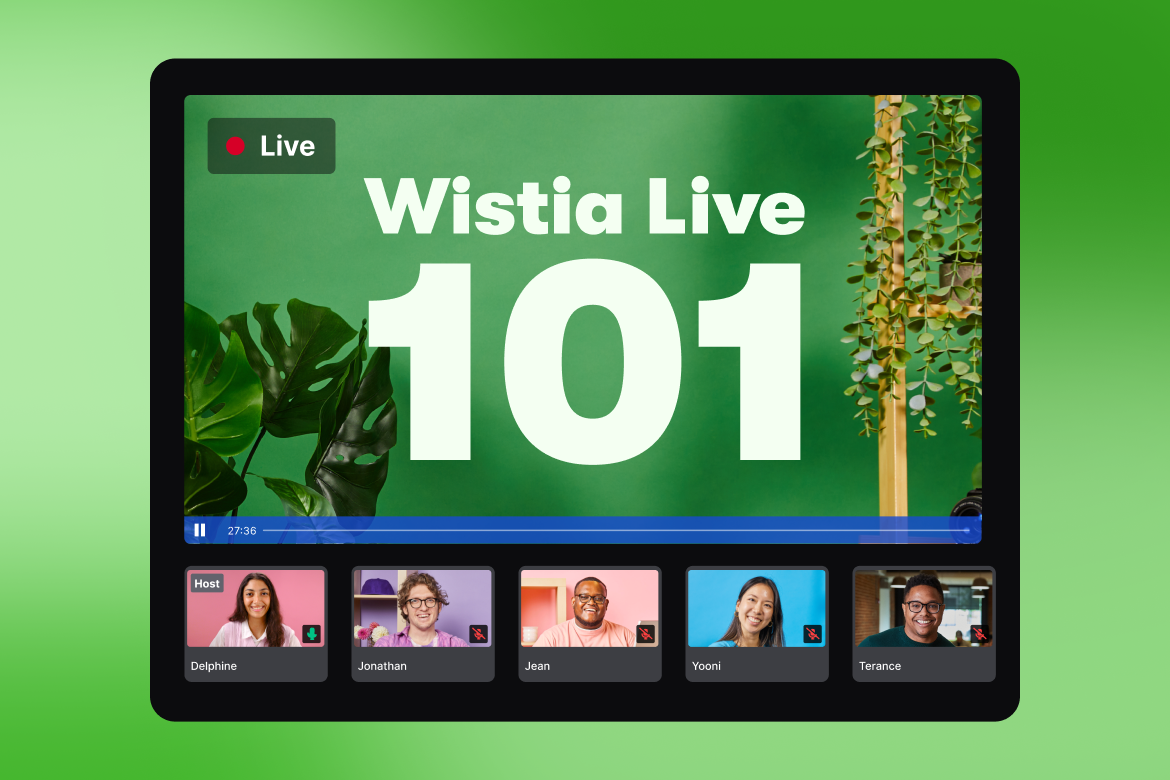
How do I join as a host or panelist and go live?
First, let’s talk about the difference between a host and a panelist:
- A host can start or end the event, pull people on or off stage, present their screen, and talk to the attendees. They need to be logged into Wistia to go live.
- A panelist is a guest who can present their screen and talk to the attendees. They don’t need to be logged into Wistia to join an event.
How to join as a host
You’re responsible for starting the live event and sending each panelist a link to join. You can send the link weeks in advance or even during the event!
When you’re ready to start your event, just hit that Go Live button. A pop-up will ask you to confirm (just in case you did it by accident), so you’ll need to hit that button again. Give it a second to connect to the server, and you’ll see a countdown. Once it hits zero, you’re live!
If you’re on the stage, the audience will see you, but if you’re removed from the stage, the audience won’t see or hear you.
How to join as a panelist
It’s simple: Get a link from the host and open it right before or during the event to join as a guest presenter.
How many panelists can I have and do they need a Wistia account?
Up to 20 panelists can join your event via the panelist link — and, no, they don’t need a Wistia account!
As a host, you can bring panelists on and off stage throughout the event. At any given time, you can have up to nine different camera feeds on stage, and people can share their screens simultaneously.
You can also have multiple co-hosts that count toward the panelist limit. You just need to join as the host and copy the link address to send to others to join as co-hosts. You can have everyone join as a co-host if you want, but that might turn your webinar into a bit of a circus! It’s usually better to keep the number of co-hosts manageable.
How do I set up an engaging viewer experience?
We’ve got a few tips:
Pick a layout
When joining as a host, you’ll choose a layout for how your audience sees you on screen. Options include tile overlay, picture-in-picture, and side-by-side. And the best part? You can switch between these layouts throughout the event!
Changing layouts affects how the audience sees you. For example, if you’re sharing your screen, removing the side-by-side view can make the screen share larger.
You can also maximize the stage to remove the chat section or minimize the chat screen. Maximizing the stage won’t change what the audience sees — this only affects the presenter. It’s helpful if the chat is blowing up and you need fewer distractions.
Chat with your audience
Anyone, including the hosts and panelists, can use the audience chat section.
There’s another chat feature in the backstage just for hosts and panelists. You can use it to queue up your next guest and make sure they’re primed and ready to deliver a seamless presentation.
Use Q&A for formal discussions
The Q&A section is a moderated version of the audience chat. If you want a more formal discussion, your audience can ask their questions here, and your team can respond in an organized thread. It also lets you delete duplicate questions or anything else you don’t need.
We love using this feature in our walk-through webinars!
Set up polls
You can go into this section before your event goes live and create polls in draft mode, which will allow you to pre-populate the polls. You can also pin your polls to the stage.
Is there a way for me to see the number of people attending my webinar live?
You bet! When you’re live, you’ll see the number of registrants and the number of attendees (including those watching backstage) in the corner of your window — and these numbers will update in real time as people join, register, or drop off.
This info can help you restructure your presentation if needed. For example, if no one is watching, you can skip audience participation.
And that’s not all! When your event ends, you can see all the chats and questions from your audience. You also have the option to download these to follow up on any unanswered questions.
Do you have webinar analytics?
Absolutely. Wistia gives you a bunch of analytics that will tell you exactly how your event performed. It’s one thing to feel like you smashed your event, and it’s another thing to have numbers to back it up. Here’s where you can find the data:
Event Recap
After your event is over, head to Live Events > Event Recap to see these event analytics:
- Top-level analytics: The event’s date, duration, start time, and end time
- Audience funnel stats: How many views your registration form got, how many people attended your event, and how many of them watched over 75% of your event
- Engagement data: How many attendee chats and questions your event had (which can give you an idea of how engaged your audience was) — and you can download the the chat log and questions
- Graph data: Shows how engaged your audience was during every second of the event, when chats were submitted, and how many attendees were focused (meaning they had an active tab open for your event)
- Attendee watch time stats: The average time watched and total time watched for your event
- Attendee interactions: The number of chat participants, chat participation for your event, and average chats per participant
- Poll performance: The number of responses and what the answers were
Registration
There’s also more data in the Registration section of Event Analytics that’ll show you how your registration form performed. Here’s what you’ll find:
- How many impressions your registration form had
- How many folks registered
- Registration rate (the percentage of people who registered for your event out of the total number of people who saw your registration form)
- The web page someone was on right before they came to your registration page through a link
- UTM Campaign data that provides insight into why traffic is coming to your registration page
- UTM Source data that helps you better understand which sites are driving traffic
- UTM Medium data that identifies the general channels from which viewers are coming
Got any other questions?
Just ask our customer support team. They’ll be happy to answer any of your questions about Wistia!
